In these days I was testing xUnit for the first time, and as a greedy developer, I started with the pre-release v2. Everything was great, except that I was trying to categories my tests in unit, integration, manual, and so on, to let me separate the CI tests from the ones, and I found misleading documentation out there, actually it was simply because there’s some breaking changes passing from v1 to v2, and one is that TraitAttribute is now sealed.
In xUnit v1 and v2 there’s the Trait attribute than can be used to add any kind of description above a test method and that can be read from visual studio test explorer and of course from gui/consoles as well. This description can be useful to let you run just a “category” of tests. See “Using Traits with different test frameworks in the Unit Test Explorer” for more information about Traits in Visual Studio 2013.
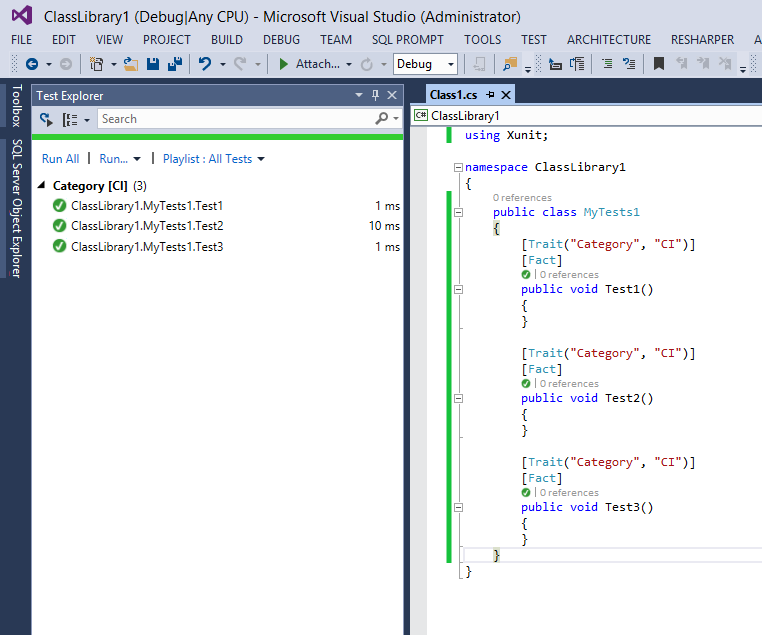
The annoying part is that Trait takes two strings as name/value pairs, and needs to be copied all around your tests:
public class MyTests1
{
    [Trait("Category", "CI")]
    [Fact]
    public void Test1()
    {
    }

    [Trait("Category", "CI")]
    [Fact]
    public void Test2()
    {
    }

    [Trait("Category", "CI")]
    [Fact]
    public void Test3()
    {
    }
}
One convenient way is to put the Trait attribute on the class itself, in that way every single method will “inherits” that attribute, and with the latest version of visual studio + updates, you will get the expected behavior in the test explorer:
[Trait("Category", "CI")]
public class MyTests2
{
    [Fact]
    public void Test1()
    {
    }

    [Fact]
    public void Test2()
    {
    }

    [Fact]
    public void Test3()
    {
    }
}
But a more convenient way could be to define our CI attribute, and in v1 was easy as inherits:
public class CIAttribute : TraitAttribute
{
    public CIAttribute()
        : base("Category", "CI")
    {
    }
}
and you can straight use it:
public class MyTests1
{
    [CI]
    [Fact]
    public void Test1()
    {
    }

    [CI]
    [Fact]
    public void Test2()
    {
    }

    [CI]
    [Fact]
    public void Test3()
    {
    }
}

[CI]
public class MyTests3
{
    [Fact]
    public void Test1()
    {
    }

    [Fact]
    public void Test2()
    {
    }

    [Fact]
    public void Test3()
    {
    }
}
…but how to do the same in xUnit v2, where the TraitAttribute become sealed? And why has become selead?
I ask this on a github issue and Brad Wilson (a team member of xUnit) replied me a really exhaustive explanation:
”
Test discovery in xUnit.net can happen without binaries (Resharper and CodeRush can discover tests as you type, by looking at the source code, even when that code doesn’t necessarily compile).
In order to support this (not being able to run code), it requires that we seal the attributes, so that discovery can be based on things that are known only from the source, and not from running compiled code.
Let’s take a common example: someone wants to make [Category("...")] which is the equivalent of[Trait("category", "...")]. Without a sealed attribute, you would write this:
public class CategoryAttribute : TraitAttribute
{
    public CategoryAttribute(string value) : base("category", value) { }
}
The problem is that Resharper or CodeRush cannot run this code, they can only look at the source. Simple examples like this may be possible, but it doesn’t take long to come up with a scenario where it becomes non-trivial and the only recourse would be to run code and see what happens.
So the tradeoff we make here is to require a bit of known-to-be-compiled code which can inspect the[Category("...")] code and return the correct trait value(s). By sealing the attribute, it says that someone who wants to write CategoryAttribute also needs to write the discoverer that can make sense of what that means without being able to run the code in question.
We have an example which does exactly this: https://github.com/xunit/samples/tree/master/TraitExtensibility
”
and here it is the migration of CIAttribute:
[TraitDiscoverer("ClassLibrary1.CIDiscoverer", "ClassLibrary1")]
[AttributeUsage(AttributeTargets.Class | AttributeTargets.Method, AllowMultiple = true)]
public class CIAttribute : Attribute, ITraitAttribute
{
}

public class CIDiscoverer : ITraitDiscoverer
{
    public IEnumerable<KeyValuePair<string, string>> GetTraits(IAttributeInfo traitAttribute)
    {
        yield return new KeyValuePair<string, string>("Category", "CI");
    }
}
Pay attention on [TraitDiscoverer("ClassLibrary1.CIDiscoverer", "ClassLibrary1")], the first argument is “The fully qualified type name of the discoverer (f.e., ‘Xunit.Sdk.TraitDiscoverer’)” and the second argument is “The name of the assembly that the discoverer type is located in, without file extension (f.e., ‘xunit.execution’)“, it took me a while to figure it out because as usual I should RTFM first 🙂


