
This is a must have tool for vs2017, you can install it directly from visual studio extensions and it’s called “Project File Tools“.


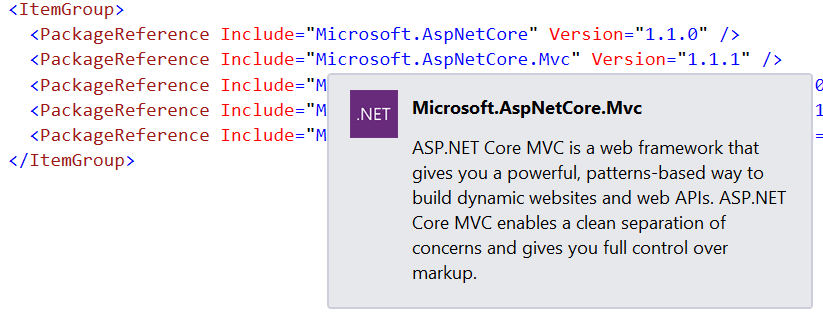
Check the github repo for more details.
This is a must have tool for vs2017, you can install it directly from visual studio extensions and it’s called “Project File Tools“.
Check the github repo for more details.
[Reblogged from How to Debug the Design Time Errors in WPF XAML File? thanks to Manish Dubeyy]
While developing WPF applications, design view plays an important role not only placing the controls but also we can see the run time view at design time. How does it look like? It becomes frustrating when we see some design time errors and we cannot put a break point in XAML file to diagnose the error, moreover due to this single error sometimes, whole designer fails rendering other controls. So this article enables us to debug the design view of XAML documents in WPF.
It is a pre-requisite that one should be familiar with basic WPF and most importantly one should know how to set design time data context. You can refer to other articles on CodeProject to know how to set a design time data context like this one.
While designing WPF applications, we frequently see the following types of error in our design view (See pic). Since XAML code does not allow us to insert a break point and debug the stuff, I will share a small trick to trap this error. (References are already there on the internet, but still developers are not so habituated to using it. The reason is that most of them don’t know it.)

app2).app2).app1 (original instance of Visual Studio in which you want break point to be hit). Now, open the file containing the design data view model (MainWindowViewModelDesignData.cs) and place a break point in the first line of its constructor.app2 again and open the View (i.e. MainWindow.xaml in which design time error is raising). It will launch the XDesProc.exe in Task Manager.app1 again, and go to Debug -> Attach to Processes… context menu item in Menu bar of Visual Studio.app2 and close and reopen the same XAML document (MainWindow.xaml). Once you do it, break point will get hit!
PersonList property which is causingNullReference Exception in WPF Designer. After fixing it, you will see that now the designer is showing the data as well.
For Visual Studio 2010 users, you will find devenv.exe in place of XDesProc.exe. Also, you can tweak with the exception settings if your break point does not becomes active (i.e., Go to Debug -> Exceptions settings -> Common Language RunTime Exceptions).
This article, along with any associated source code and files, is licensed under The Code Project Open License (CPOL)
[Reblogged from WPF Design Time Support (Part 2) thanks to jbe2277]
The WPF Designer works best if there is just one WPF project in the solution which is the application (exe) and so contains the App.xaml file. Then it will find all XAML resources that are necessary to render the views flawlessly. But in larger applications the views are often separated into different WPF projects (e.g. per module). In such a scenario the WPF designer is not able to find the resources defined or referenced in App.xaml anymore when this file resides in another project.
Microsoft introduced the Design-time Resources Dictionary file to overcome this issue. Blend is able to detect that some resources could not be resolved and asks us if we want to add a resource dictionary to use for displaying resources at design time.

Visual Studio uses this file as well but it is not able to create the file. If you want to create this file in Visual Studio then you have to create a Resource Dictionary (WPF). Use DesignTimeResources.xaml as file name and after creation move the file into the Properties folder in your project tree.
Now unload the project (Context menu of the project node in Solution Explorer). Then select Edit YourProject.csproj in the context menu of the unloaded project node. Search for the XML element that contains DesignTimeResources.xaml and replace it with the following XML snippet:
<Page Include="Properties\DesignTimeResources.xaml" Condition="'$(DesignTime)'=='true' OR ('$(SolutionPath)'!='' AND Exists('$(SolutionPath)') AND '$(BuildingInsideVisualStudio)'!='true' AND '$(BuildingInsideExpressionBlend)'!='true')">
  <Generator>MSBuild:Compile</Generator>
  <SubType>Designer</SubType>
  <ContainsDesignTimeResources>true</ContainsDesignTimeResources>
</Page>
Reload the project. The DesignTimeResource dictionary can be filled with MergedDictionaries. In the following example the merged dictionaries reside in another assembly. Thus, the long Source path is used.
<ResourceDictionary
    xmlns="http://schemas.microsoft.com/winfx/2006/xaml/presentation"
    xmlns:x="http://schemas.microsoft.com/winfx/2006/xaml">

    <ResourceDictionary.MergedDictionaries>
        <ResourceDictionary Source="/Waf.InformationManager.Common.Presentation;Component/Resources/ImageResources.xaml"/>
        <ResourceDictionary Source="/Waf.InformationManager.Common.Presentation;Component/Resources/ConverterResources.xaml"/>
This file will be ignored by the compiler. It does not have any effects on the running application. It is just used to improve the design time experience.
Took directly from visual studio site: Hosted build controller.
You can check the detail list, and install the visual studio extension “Avanade Extensions for VS2012” (VS2013 version) to track the software installed on the hosted build server using the Software Inventory functionality.
The hosted build server is deployed with the following software:
Today I found a cool Visual Studio functionality: you can paste an XML or JSON source as Classes, in fact creating all the object model to serialize and deserialize object with the xml format, all this without using xsd.exe tool.
Here’s the very simple steps regarding an XML but it’s the same for JSON:
1 – The most difficult step….. copy the xml source in the clipboard, something like CTRL+A and CTRL+C 🙂
Is ridiculous to add a screenshot, but I’ve got it, so why not!
2 – Create a new empy class file… no more screenshot please! ok here we go 😉
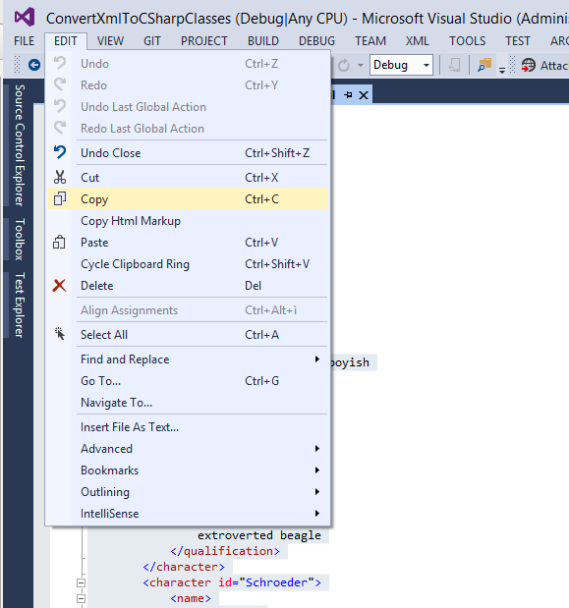
3 – Go to Edit -> Paste Special -> Paste XML As Classes, to paste the generated classes based on the source xml


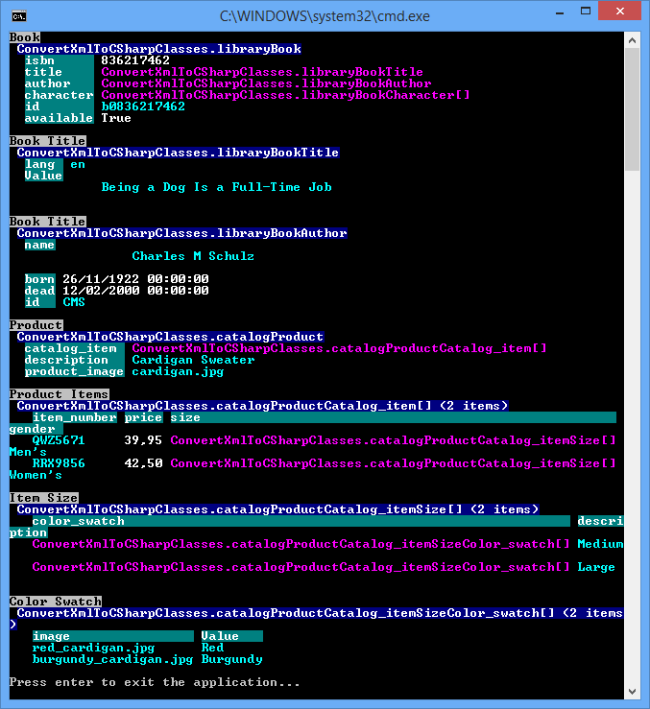
Here’s the code I’ve used to test the deserialization:
using System;
using System.IO;
using System.Text;
using System.Xml.Serialization;
using ConsoleDump;
using ConvertXmlToCSharpClasses.Properties;

namespace ConvertXmlToCSharpClasses
{
    internal class Program
    {
        private static void Main(string[] args)
        {
            TestSample1();

            TestSample2();

            Console.WriteLine("Press enter to exit the application...");
            Console.ReadLine();
        }

        private static void TestSample1()
        {
            var serializer = new XmlSerializer(typeof(library));
            var buffer = Encoding.UTF8.GetBytes(Resources.Sample1);
            using (var stream = new MemoryStream(buffer))
            {
                var library = (library)serializer.Deserialize(stream);
                library.book.Dump("Book");
                library.book.title.Dump("Book Title");
                library.book.author.Dump("Book Title");
            }
        }

        private static void TestSample2()
        {
            var serializer = new XmlSerializer(typeof(catalog));
            var buffer = Encoding.UTF8.GetBytes(Resources.Sample2);
            using (var stream = new MemoryStream(buffer))
            {
                var catalog = (catalog)serializer.Deserialize(stream);
                catalog.product.Dump("Product").catalog_item.Dump("Product Items")[0].size.Dump("Item Size")[0].color_swatch.Dump("Color Swatch");
            }
        }
    }
}
You can also download the test project.
4 – Enjoy your saved time
Attachment with the sample: NugetPackageRestore.zip
Today I had a problem using nuget package restore in a quite complex project that has multiple projects and multiple solutions file located in different folders, so that nuget was restoring the packages in a wrong folder for some of my solutions.
For instance if you have a file structure like this:
Root
  |- ProjectA
  |- |- ProjectA.Model
  |- |- |- ProjectA.Model.csproj
  |- |- ProjectA.Service
  |- |- |- ProjectA.Service.csproj
  |- |- ProjectA.sln
  |- Project B
  |- |- ProjectB.Model
  |- |- |- ProjectB.Model.csproj
  |- |- ProjectB.Service
  |- |- |- ProjectB.Service.csproj
  |- |- ProjectB.sln
  |- AllMyProjects.sln
AllMyProjects.sln simply contains all the projects (ProjectA.Model.csproj, ProjectA.Service.csproj, ProjectB.Model.csproj, ProjectB.Service.csproj).
When you run the build for all the 3 solutions, nuget by default will restores everything in a folder “packages” located at the same level of the solution file, producing something like this:
Root
  |- Packages
  |- (...all the packages...)
  |- ProjectA
  |- |- Packages
  |- |- |- (...all the packages...)
  |- |- ProjectA.Model
  |- |- |- ProjectA.Model.csproj
  |- |- ProjectA.Service
  |- |- |- ProjectA.Service.csproj
  |- |- ProjectA.sln
  |- Project B
  |- |- Packages
  |- |- |- (...all the packages...)
  |- |- ProjectB.Model
  |- |- |- ProjectB.Model.csproj
  |- |- ProjectB.Service
  |- |- |- ProjectB.Service.csproj
  |- |- ProjectB.sln
  |- AllMyProjects.sln
Now, if you first compile the ProjectA.sln and ProjectB.sln, also the AllMyProjects.sln will compile fine, but this just because the packages will be correctly restored by the two specific solution ProjectA.sln and ProjectB.sln, but if you try to clean up all the packages folder, and build the AllMyProjects.sln first, you will get a lot of compile error, this because the projects are poiting the nuget restored dll(s) inside specific folders and not a generic folder instead.
One possible fix to this, is to move all the solutions file, under the same folder, to le restore the packages to the same folder for every project, but I preferred to leave the structure as is, and try to force the nuget packages restore process. In fact there’s a key configuration “repositoryPath” to override the default packages folder location.
These are the steps to move the packages folder to a common location:
1 – Create a NuGet.config file under the root folder (nuget will find and use this file using a recursive search, starting from .nuget folder of the solution folder):
<?xml version="1.0" encoding="utf-8"?>
<configuration>
  <config>
    <add key="repositoryPath" value="$\..\Packages" />
  </config>
  <solution>
    <add key="disableSourceControlIntegration" value="true" />
  </solution>
</configuration>
$ = refers to the NuGet.config file
we need to type “$\..\” and not just “$\” to set the Root folder just because I think is a kind of bug.
You will end-up with something like this:
Root
  |- ProjectA
  |- |- ProjectA.Model
  |- |- |- ProjectA.Model.csproj
  |- |- ProjectA.Service
  |- |- |- ProjectA.Service.csproj
  |- |- ProjectA.sln
  |- Project B
  |- |- ProjectB.Model
  |- |- |- ProjectB.Model.csproj
  |- |- ProjectB.Service
  |- |- |- ProjectB.Service.csproj
  |- |- ProjectB.sln
  |- AllMyProjects.sln
  |- NuGet.config
2a – Edit all the projects file and fix the dll reference by replacing the old relative path with the new one
2b – In alternative to 2a, you can run the nuget command “Update-Package –reinstall” from the nuget “Package Manager Console”, but this can dirty you projects, then I prefer do it manually directly from notepad 🙂
3 – Delete all the Packages folder and try to build every solution. To best test that everything is fine, before build a solution always delete the packages folder. You should see the “Packages” folder only once:
Root
  |- Packages
  |- (...all the packages...)
  |- ProjectA
  |- |- ProjectA.Model
  |- |- |- ProjectA.Model.csproj
  |- |- ProjectA.Service
  |- |- |- ProjectA.Service.csproj
  |- |- ProjectA.sln
  |- Project B
  |- |- ProjectB.Model
  |- |- |- ProjectB.Model.csproj
  |- |- ProjectB.Service
  |- |- |- ProjectB.Service.csproj
  |- |- ProjectB.sln
  |- AllMyProjects.sln
  |- NuGet.config
The Windows Azure Managed Library provides classes for accessing the local storage resource from within code that is running in a role instance.
You will just need to retrieve the full path of a named local storage, and then you can store any file you want. To retrieve the full path, you simple need this line of code:
RoleEnvironment.GetLocalResource("MainLocalStorage").RootPath
On a cloud service, you can create a small local storage where you can save temporary files, yes I said temporary, because a local storage would not be guaranteed to be durable, for durable storage in Azure you should consider Azure SQL Database or Azure Storage (blob and tables). This reserved space could be useful to store custom error log files (nlog, log4net, …), for those files that are dynamically created by the application and you would like to cache it somewhere, and also for structured data files like database(sql ce, sqlite, …), but remember, just for volatile data.
You can create a local storage manually configuring the Service Definition configuration file, or through the visual studio user interface:
Open the Properties of the Web Role under the Cloud Service Project, go to Local Storage section, and click on “Add Local Storage”, name the storage, give a size, and save.

For more information about Local Storage Resources visit http://msdn.microsoft.com/en-us/library/windowsazure/ee758708.aspx
You can accomplish this easy step just right-clicking on the Web Project and then select the menu entry “Add Windows Azure Cloud Service Project”

A PaaS cloud service, web or worker role, can be added in a Virtual Network only by changing its service configuration file (ServiceConfiguration.Cloud.cscfg).
You need to add the NetworkConfiguration node just after the Role node as follow:
<?xml version="1.0" encoding="utf-16"?>
<ServiceConfiguration xmlns:xsd="http://www.w3.org/2001/XMLSchema" xmlns:xsi="http://www.w3.org/2001/XMLSchema-instance" serviceName="MyAzureApplication" osFamily="3" osVersion="*" schemaVersion="2013-03.2.0" xmlns="http://schemas.microsoft.com/ServiceHosting/2008/10/ServiceConfiguration">
    <Role name="MyMvcWebRole">
        <ConfigurationSettings>
            <Setting name="Microsoft.WindowsAzure.Plugins.Diagnostics.ConnectionString" value="DefaultEndpointsProtocol=https;AccountName=xxx;AccountKey=xxx" />
        </ConfigurationSettings>
        <Instances count="1" />
    </Role>
    <NetworkConfiguration>
        <VirtualNetworkSite name="myazure-vnet"/>
        <AddressAssignments>
            <InstanceAddress roleName="MyMvcWebRole">
                <Subnets>
                    <Subnet name="MainSubnet"/>
                </Subnets>
            </InstanceAddress>
        </AddressAssignments>
    </NetworkConfiguration>
</ServiceConfiguration>


